Unreal Engine 4 gives you a fantastic new toolset for building games, including blueprints. Blueprints are a form of visual scripting that requires little experience in code to get started. This new method of building game logic lends itself toward implementing solid design concepts and getting the most out of the code you write.
Blueprints are flowcharts that include gates and control structures for providing game objects in scenes with incredibly flexible behaviors. This tutorial will walk you through building composite Actors for scenes in Unreal. It will show you how to work with automation to give access to these components for other items in your scenes. Despite writing code by dragging lines between nodes, we’ll also touch on good software design practices to make things awesome. It sounds crazy, but we’ll be implementing a traditional Object-Oriented structure in a purely visual language!
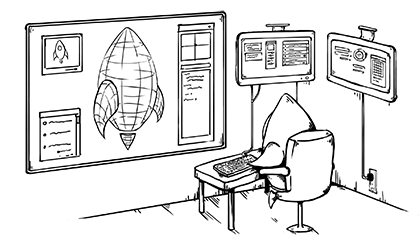
We are building a first-person shooter targeting mobile devices. This means dealing with extreme limitations in how the user can interact with our game. We want to provide a high-intensity and fast paced play-style; We’ll provide the player with dynamic choices for movement based on their environment, then smoothly move the character to those points. The player can look at an object in the scene, then quickly move to that object with a gesture.
Are There Existing Solutions?
Before implementing, we looked around at the tools available to see if there is any way (other than writing code) to solve our problem. By themselves, actors (scene objects) support physics and ray casting. This could be enough to implement a workable solution, but we want a way to indicate importance for certain areas and faces on objects to which the player can stick. In certain situations we want the player to stick to a specific corner for dramatic effect — crouch behind a jersey barrier or travel up stairs. It would be difficult to describe all of the details for performing these actions without minimally decorated objects.
Considerations for Workflow
We need to build a mechanism for our level designers to quickly define new move targets without needing to wire a bunch of additional blueprint code. You could imagine a massive amount of data to manage if every single point in a scene had to be defined by hand. Each instance of every single piece of geometry the player can hide behind, cling to, or otherwise walk toward.
We must design components that meet our primary objective but also provide for the rapid development of new content. This should require minimum maintenance by the tech director and level designers. If we implement stuff that can be reused or repurposed for other things we get cookies!
The Base Class
We need to build a base class for anything that the player can move toward. In this base class we need a few functions to simplify working with individual movement points attached to items that might extend our base. Our solution will be entirely based in blueprints — no C++ required.
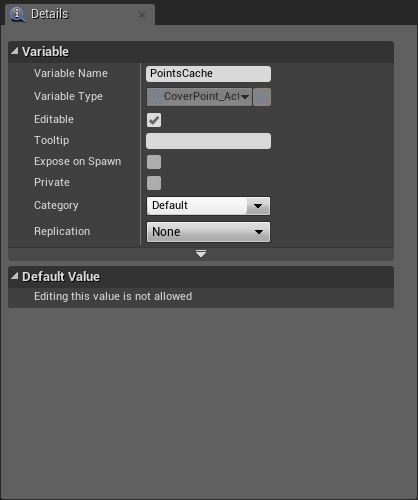
The base class needs to retain a list of points to work with later. We will be raycasting onto the objects that derive from this class and want to quickly locate any points that belong to it. We can cache the points in an array instance of our custom CoverPoint_Actor.
Now that we have a place to store the points we need a method or mechanism to do some self-discovery. We searched around for methods to do this with minimal boilerplate. There is the “Unreal Approved” method for calling methods on the parent class, but I’ll warn you — it feels like a bit of a hack.
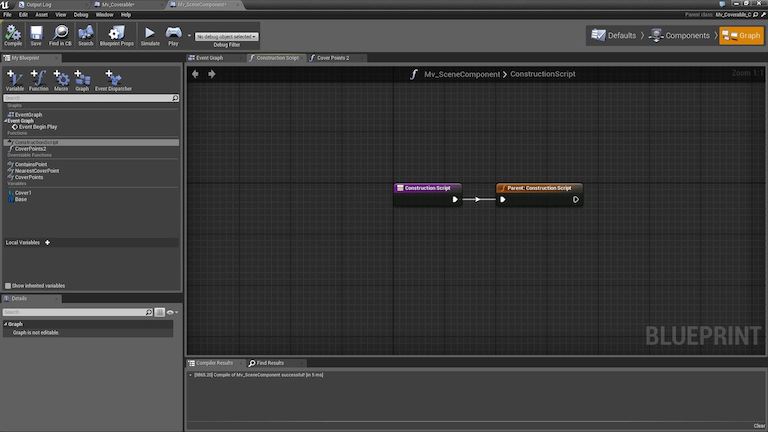
The ConstructionScript for any blueprint should be fired whenever the component is created in the scene. This should happen whether you spawn an actor at runtime or have something defined in your scene. Even when you implement C++ based classes in the engine, you are required to manually call parent class methods in all of your child objects. Darn. We can live with it though. Here is a sample of what we do in our ConstructionScript to capture all of the child points in our base class Coverable:

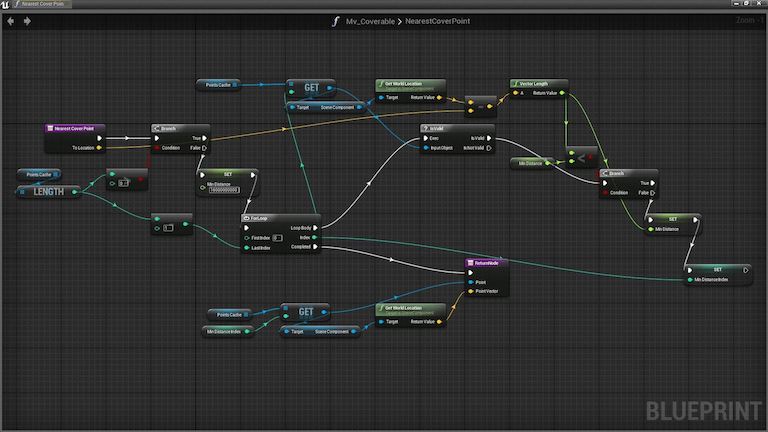
Since we’re dealing with positional data, we need to find out which points are closest to some location (a vector, later specified) in 3D space. Let’s add a NearestCoverPoint function to iterate through our set of cached points and return the point closest to the location we are examining.
The Wall
With our base class defined we can continue our workflow. In the following examples we create a subclass of our Coverable base class and then wire it up to work with our system.
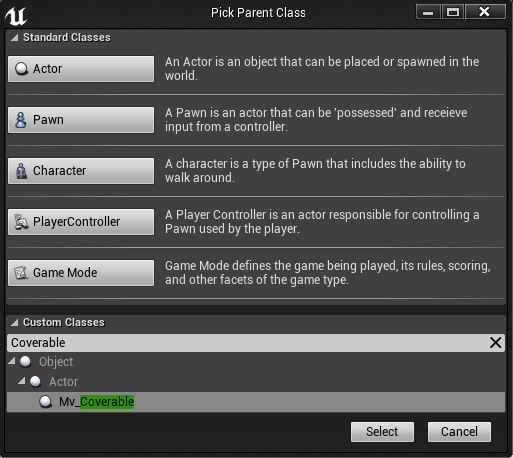
Create a component by selecting New in the content browser, then type “Coverable” in the field below the preset blueprint types, e.g.,
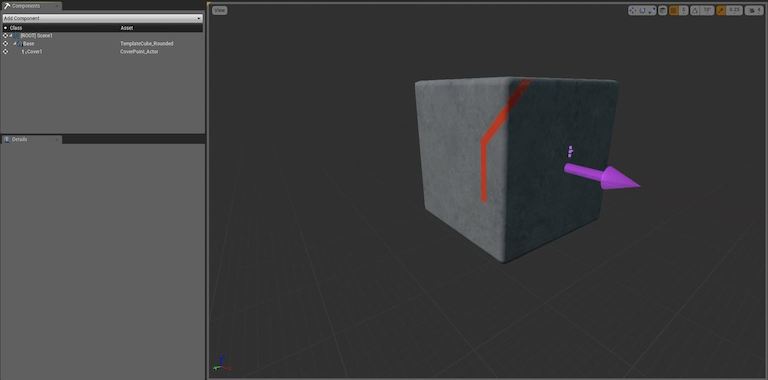
With your new blueprint open in the editor window, switch to the Components tab (the 3D view), select Add then type “ChildActor”. Child actors are really interesting with Blueprints because your Actor turn into a kind of sub-scene. Neat.
With the ChildActor component selected tell it to use whatever Actor_C as its type (for the actor class definition, not an instance). This will automatically add a new instance of that actor class to your blueprint. Make sure that the new actor is parented to the root item (by dragging it over top of that item) and you are done. It should look like this:
Remember we linked the cover points cache function into the base class using its constructor? Now whenever we need to create a new Coverable item, we only need to implement a parent method call. Doing this in Blueprints is pretty simple but it still qualifies as Boilerplate. Boilerplate is bad.
Now we have a nice little object hierarchy. If we later make performance improvements to finding closest points or want to change our object model on Coverpoints we don’t have to worry that our subclasses would be incompatible.
Now let’s have some fun and push it.
Casting Rays like Magic Spells
Once the object is place in the world the player points their camera at an object. As the center of the view touches compatible objects we can notify the player visually that a surface can be moved-to.
Our current implementation accomplishes this by having the PlayerController fire a single ray once per frame. Rays aren’t computationally expensive but we do want to limit the number we use for basic utility purposes. This will ensure we don’t create a performance problem that will need to be refactored later.
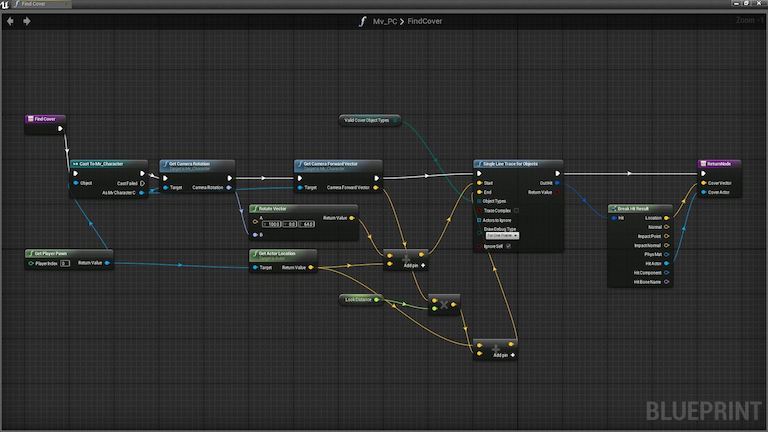
The first step is to cast a ray from the camera’s location against the world in a forward direction. This method fires a ray that returns the first thing hit, and then filters that item to ensure that we only attempt to process compatible objects.
Once we receive a list of items we pare that list down to things which extend our base class. This demonstrates the value of using a Blueprint base class since we don’t have to rely on component names or another mutable value.
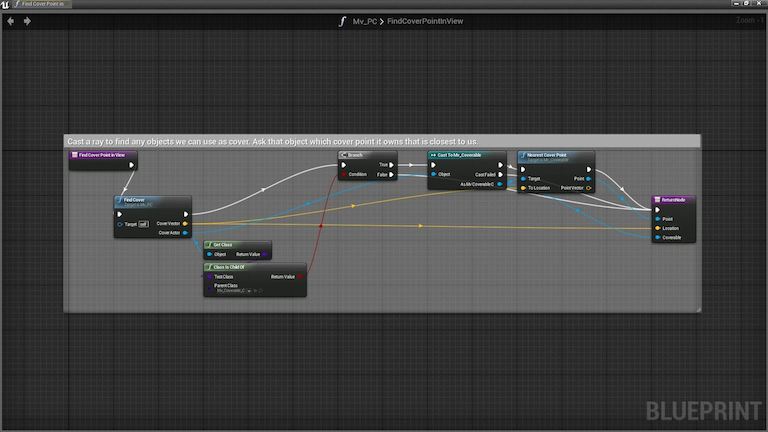
From here we have the nearest point inside of our Coverable sub-class, closest to the player in the world. In our particular implementation we do some extra processing to display an icon in 2D space directly on top of the point. This gives the user an item they can tap or click to proceed to that point.
Cleaning up after yourself.
As you can see, Blueprints can be powerful but there are a few gotchas to consider. When you implement a method with a return value, Unreal does not care if you actually invoke the return signal block. In the example above, you can see that both paths return to the caller. In this case it is safe to assume that a null reference will be passed up the chain because we are required to perform an IsValid check on the response before working with the data. You can also create a private variable inside your function and set that through your logic tree. This enables you to return a sane default value in the case where you did not find what you were seeking.
Any event can be overridden in a child class by using the parent method invocation. To access this you right-click on the event name and select Add call to parent function. This hard-to-find gem saved a ton of code in our examples.
When you are doing traditional programming, i.e., lines of code, it is generally good practice to make sure your code is clear and easy to comprehend. This helps the person coming behind you and minimizes code-debt. Just because Blueprints are visual doesn’t mean that you should forget best practices. Creating callback references that span the entire length of your graph, letting nodes overlap and having things look messy can create hard-to-maintain code. Keep it clean, kids!
Republic Sniper
MartianCraft is producing the first game in the Turncoat™ universe. Take part in the war for control of the solar system between Earth and Mars. Do you have what it takes to be a Republic Sniper?
Boilerplate: Code that you have to re-implement in a lot of places with often minor changes for configuring your components.