The MacBook is a machine of compromises. Many believe it has a processor too slow—and a screen too small—for the demands of serious work. When people find out I own a MacBook, they all ask the same thing: is it any good for real work?
The short answer is yes, the longer answer is… well, the rest of this article. But before we go any further, let’s address some of the common slights levied against the MacBook:
Not enough power. The Macbook is the least powerful machine in the current Mac line-up. In fact, you’d have to go back a few years to find an Apple laptop of comparable speed. However, processing speed is less important than you think for development. Sure, the Swift compiler can take its time, but if you compare compile time on an average-sized project between the MacBook and a contemporary Apple laptop, you’ll find the difference measurable in seconds. Seconds.
The truth is, most modern hardware is perfectly well equipped for development — especially when paired with current solid state storage. It has been for a while. She’s a fast enough ship.
The keyboard is terrible. The keyboard on the MacBook is probably the most divisive hardware decision Apple has made this year. Some love it, others hate it. To be honest, I’m ambivalent after using it for a few months. I recommend you try it in a store before buying it. It’s a subjective decision, but here are a few facts regarding the keyboard:
- Key travel is significantly reduced (boo)
- Key size is noticeably larger (yay)
- Key wiggle has been eliminated (yay)
- The keys are slightly sculpted, instead of completely flat (yay)
- San Francisco (double yay)
I would adore this keyboard if key travel was doubled. Just sayin’ Apple…
Screen is too small. The MacBook is meant to be a small computer and there is no design magic that can increase the size of the screen without also increasing the overall size. If you’re used to a MacBook Air 11” screen like me, this screen will feel like a revelation, especially since the MacBook is smaller! But there are many who feel they can’t work on a screen that small. It took me a few months to get used to diminished screen real estate and bend the tools to a useful state. A lot of these tips come from my earlier experience working on an 11” MacBook Air.
However, now that I have the tools working in the smaller screen, it allows me to take advantage of the MacBook’s smaller size and diminished weight for creative work while on the go.
The MacBook offers a smaller overall package and further weight loss over the already small MacBook Air. I love the MacBook and I want you to love it too. Let’s dig into how I learned to work with a smaller screen and became effective doing creative work on the MacBook.
Initial Setup
As I mentioned earlier, it’s the MacBook’s lack of screen real estate that poses the greatest challenge for development and design work. First I recommend you increase display resolution to the More Space level in Display panel of System Preferences:
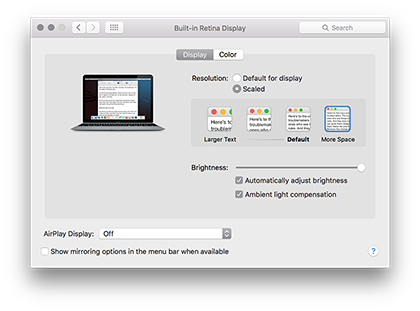
This gives you a canvas with a logical resolution of 1440 x 900 which is the same as the default size on a 15” MacBook Pro. Chances are you’re already accustomed to using Xcode with this resolution in the recent past.
You’ve probably already noticed I’m running the OS X 10.11 betas based on the screenshot above. While this article applies equally to users running OS X 10.10 “Yosemite”, you will notice a dramatic increase in UI performance once you put OS X 10.11 on your MacBook. Yes, it’s a beta — but we’re all developers, right?
Basic Principles
You want to consider a few basic principles when trying to reclaim screen real estate. A lot of applications default to settings that can be tweaked to increase screen real estate.
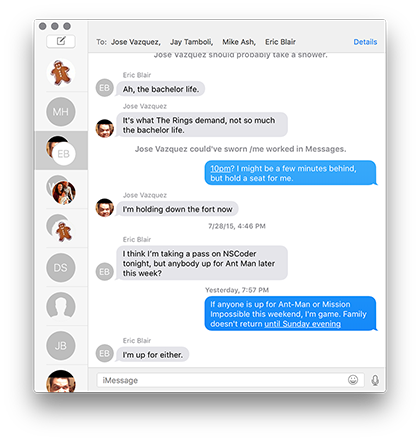
Try to eliminate, collapse, or minimize toolbars and sidebars. Use keyboard shortcuts, when possible.
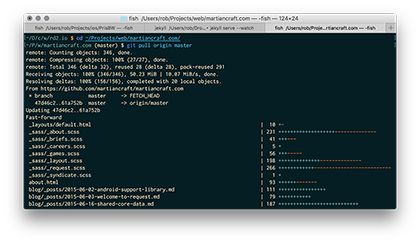
Consider smaller font sizes for text windows. I use Inconsolata at 14pt in my Terminal and at 13pt in my Xcode windows. Since it's hinted for print, it looks great on the retina screen of the Macbook.
In BBEdit (my editor of choice) I use
Consolas for BBeditat 12pt, which gives me 120 lines of text while barely taking half of the horizontal screen real estate of the MacBook.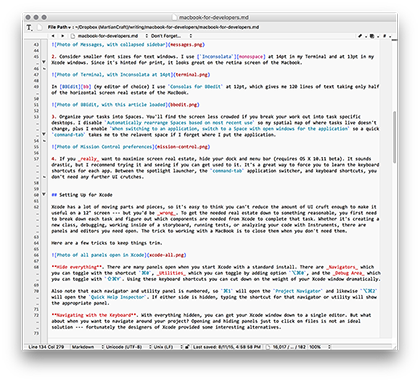
Organize your tasks into Spaces. You'll find the screen less crowded if you break your work out into task-specific desktops. I disable
Automatically rearrange Spaces based on most recent useso my spatial map of where tasks live doesn't change, plus I enableWhen switching to an application, switch to a Space with open windows for the applicationso a quickcommand-tabtakes me to the relavent space if I forget where I put the application.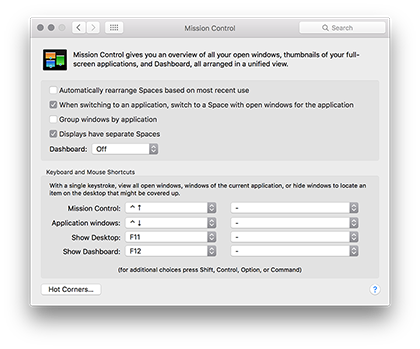
If you really want to maximize screen real estate, hide your Dock and Menu Bar (requires OS X 10.11 beta). It sounds drastic, but I recommend trying it and seeing if you can get used to it. It’s a great way to force you to learn the keyboard shortcuts for each app. Between the spotlight launcher, the command-tab application switcher, and keyboard shortcuts, you don’t need any further UI crutches.
Setting Up for Xcode
Xcode has a lot of moving parts and pieces, so it’s easy to think you can’t reduce the amount of UI cruft enough to make it useful on a 12” screen — but you’d be wrong. To get the needed real estate down to something reasonable, you first need to break down each task and figure out which components are needed from Xcode to complete that task. Whether it’s creating a new class, debugging, working inside of a storyboard, running tests, or analyzing your code with Instruments, there are panels and editors you need open. The trick to working with a MacBook is to close them when you don’t need them.
Here are a few tricks to keep things trim.
Hide everything. There are many panels open when you start Xcode with a standard install. There are Navigators which you can toggle with the shortcut ⌘0, Utilities which you can toggle by adding option ⌥⌘0, and the Debug Area which you can toggle with ⇧⌘Y. Using these keyboard shortcuts you can cut down on the weight of your Xcode window dramatically.
Also note that each navigator and utility panel is numbered, so ⌘1 will open the Project Navigator and likewise ⌥⌘2 will open the Quick Help Inspector. If either side is hidden, typing the shortcut for that navigator or utility will show the appropriate panel.
Navigating with the Keyboard. With everything hidden, you can get your Xcode window down to a single editor. But what about when you want to navigate around your project? Opening and hiding panels just to click on files is not an ideal solution — fortunately the designers of Xcode provided some interesting alternatives.
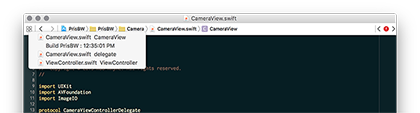
First, there is the navigation bar across the top of the file. You can click into any part of the bar to navigate through your entire project… or you could use the keyboard shortcuts. ⌃2 lets you jump to recent files in your history, while ⌃5 shows you other files in the current group, and ⌃6 lets you navigate within the open file. If you want to open a file in the Assistant Editor, just add option (either ⌥⏎ or ⌥-click).
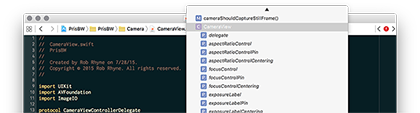
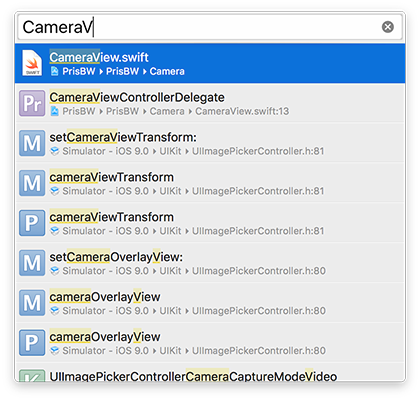
If you know the file you need to open, ⇧⌘O will open a dialog that works similar to Spotlight. Simply type in the name of the file (or class) you want to open, then hit return. Like above, adding option ⌥⏎ will open the file in the assistant editor. This is perfect for checking the method signature for an API you’re calling without leaving the editor, or opening a new window.
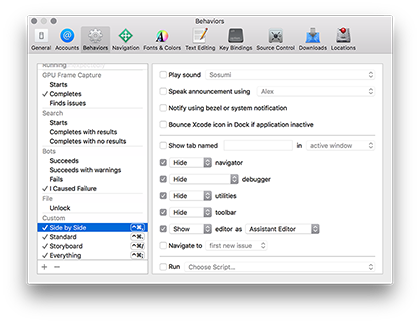
Setup Behaviors. Opening and closing panels can become tedious when context switching, e.g., switching from writing code to debugging an unexpected side effect. Since development is full of these context switches, I created a series of keyboard shortcuts for several window configurations using Behaviors. You can create your own by going to the Behaviors in Xcode preferences. Below I list the four I use regularly:
-
Side by Side (
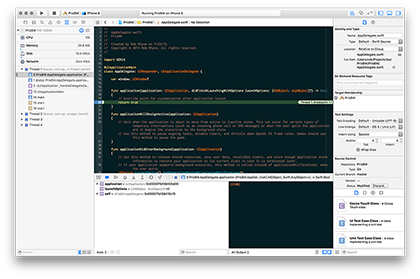
⌃⌘,): This is my code writing workhorse. I hide navigator, debugger, utilities, and the toolbar, plus I open theAssistant Editor. Full-screen on the MacBook I get two code windows side-by-side (each 80 columns wide in my preferred 13pt Inconsolata). -
Standard (
⌃⌘.): When you’re creating new files, it’s easiest to have theProject Navigatoropen. This will also switch to theStandard Editor, plus hide the debugger, and utilities. This is perfect when you have the simulator peaking behind it and need to switch quickly to it. -
Storyboard (
⌃⌘/): Storyboards are screen real estate hogs, so I hide everything but the utilities andStandard Editor. Full screen there is enough space to add constraints to a view, but setting outlets with theAssistant Editorwon’t yield a full-size code window. Fortunately you typically set them once and move on, so it isn’t terrible. -
Everything (
⌃⌘;): This does what it says on the tin. It opens the navigator, debugger, utilities, and un-hides the toolbar if it was hidden. I don’t use this view often on my MacBook, but it comes in real handy on my desktop Macs. This is most useful when you’re learning where everything is, and can’t always remember. It’s a good reset, too, if someone accidentally committed their.xcuserstateinto the repo.
Setting Up for Photoshop
Photoshop also presents its own assortment of UI panels, and like Xcode, they don’t need to be on screen for most tasks. Getting started with Photoshop, I hid all but the most necessary panels, leaving: Tools, Options, History, and Layers.
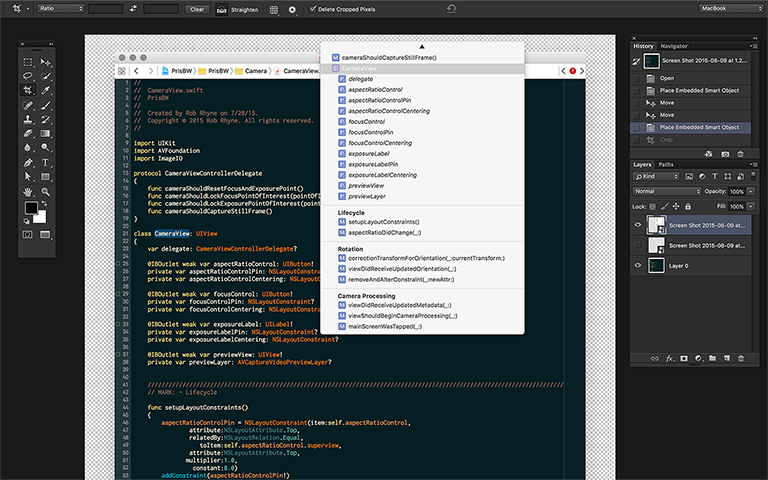
Above you can see Options laid across the top horizontally, with the Tools panel on the left with History stacked on top of the Layers palette on the right. I also take Photoshop full screen typing F twice to switch to the full screen mode. This removes several status bars that I find unnecessary clutter.
Zooming In & Out. With the smaller screen, it can be difficult to visualize a large file, like a Mac or iPad screen comp without zooming in to view details or zooming out to see the big picture. To quickly bounce between a 1-to-1 pixel view and a view fit to the screen bounds, you can use the shortcut ⌘1 for 100% and ⌘0 to fit the zoom level to the current screen size. You can zoom in beyond 100% with ⌘+ and zoom out with ⌘-.
You can also use the Zoom Tool (Z) to draw a box you want to zoom into. There’s also the Hand tool that can be activated by holding down the spacebar and dragging the canvas to the desired position.
Sometimes the keyboard commands are a little too obtuse or perhaps you just want to know the current zoom level. For this, I group the Navigator palette with the History palette. Equally compact as before, but with a view that provides the current zoom percentage and a slider to alter the current zoom level.
Take Advantage of Tools. The only way the above setup could be more compact is by hiding the Tool palette. To do that you would need to know all of the single-letter keyboard shortcuts. Additionally, you would have to rely on the cursors to determine which mode you are in.
Personally, I try to strike a pragmatic balance so I keep the Tool palette visible. I use it to know which tool is selected, but still rely on their keyboard shortcuts to switch between them:
-
Move Tool (
V): This is my visual reset, since it’s the easiest way to move and resize layers, but also to locate layers by their bounding box. I instinctively hitVevery time I open a new.psd. I also turn on the Show Transform Controls option which places a selection cage over the currently selected layer. -
Marquee Tool (
M): Another reset tool. Since I show transform controls, I can’t get a preview of the current composition when the Move Tool is selected. To quickly toggle a preview, I’ll select this tool to remove decoration from the currently selected layer. I often typeMfollowed closely by⌘0to review the entire comp. -
Type Tool (
T): Beyond inserting new text layers, this tool presents options for the font including size, family, font-smoothing, and alignment. When a type layer is selected, switching to this tool puts those options in the Option bar along the top. This avoids the need to show the Characters palette.
Use Workspaces. Obviously this is the minimally viable setup for using Photoshop in a constrained space. If you connect a larger monitor and would like more panels open, Workspaces can help you quickly switch between different canvas configurations.
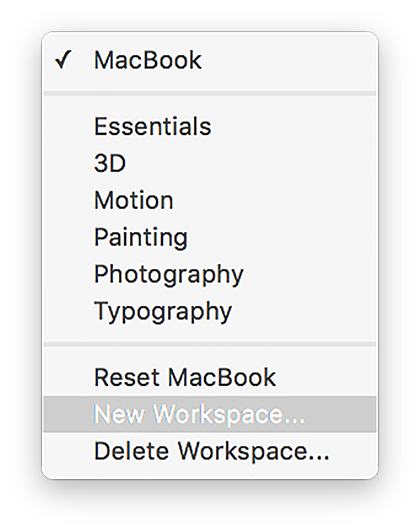
To setup a new workspace, simply hide and un-hide the panels you want to see, then arrange them on screen and select New Workspace from the menu above.
Don’t Forget…
In general the MacBook’s single port is a non-issue. Battery life is so consistently long, it feels foreign when you have to plug it in. However, the new USB-C does pose a dilemma for mobile developers: you need an adaptor to connect your iOS devices. That’s a bummer, having yet another adaptor to carry in your bag. I decided to combine a smaller Lightning cable with the single USB-C to USB adapter for smaller option:

This single solution produces an effective cable long enough to interact with the device while debugging, but compact enough to fit inside of a small bag. And at $26 USD it’s substantially cheaper than the bulkier multiport adapter. Since battery life is rarely a problem, I don’t often find myself wanting to charge the laptop while developing. Like my iPad and iPhone, I only plug in my MacBook at the end of the day.
The Promise of the MacBook
To some this might seem like a lot of extra work. Why bother trying to get an underpowered computer to work when there are less expensive options that provide a better value? For me, I wanted a small computer that I could take with me everywhere and I can’t write code on the iPad. The MacBook gives me a fully capable computer, running the Mac OS — an OS built for creative people. By getting the MacBook to work as a workbench for designing and developing applications, I can take my creative work more places.
It also provides a more focused work environment. In this article, I describe how I removed superfluous UI and hid window chrome out of the way. You only need to do this once, then only the essentials needed to complete the job remain. Uncluttered. Perfect.
The MacBook is a machine of compromises. If you embrace them, it will make you better, and more efficient.